You’ve heard of sock puppets, but let me introduce you to glove puppets! These puppets fit on your hand and wrist just like a glove and are super easy to make. They’re great for kids and professional puppeteers alike.
Let’s learn how to make a simple glove puppet! You can get the same supplies I use from HERE! This is the perfect project to do at home with the family or even in a classroom setting. Follow along with this video tutorial to see the entire puppet building process!
To Learn how to make an ADVANCED Glove Puppet CLICK HERE!
You have all your materials and you’re ready to go, so let’s begin!
STEP 1 – Trace Out the Puppet
I’m using fleece for my puppet, but you can use fur, felt, or whatever moldable material you’d like. Begin by folding your fleece so that it’s double layered and trace your pattern onto the material of your choice.
STEP 2 – Cutting Out the Puppet
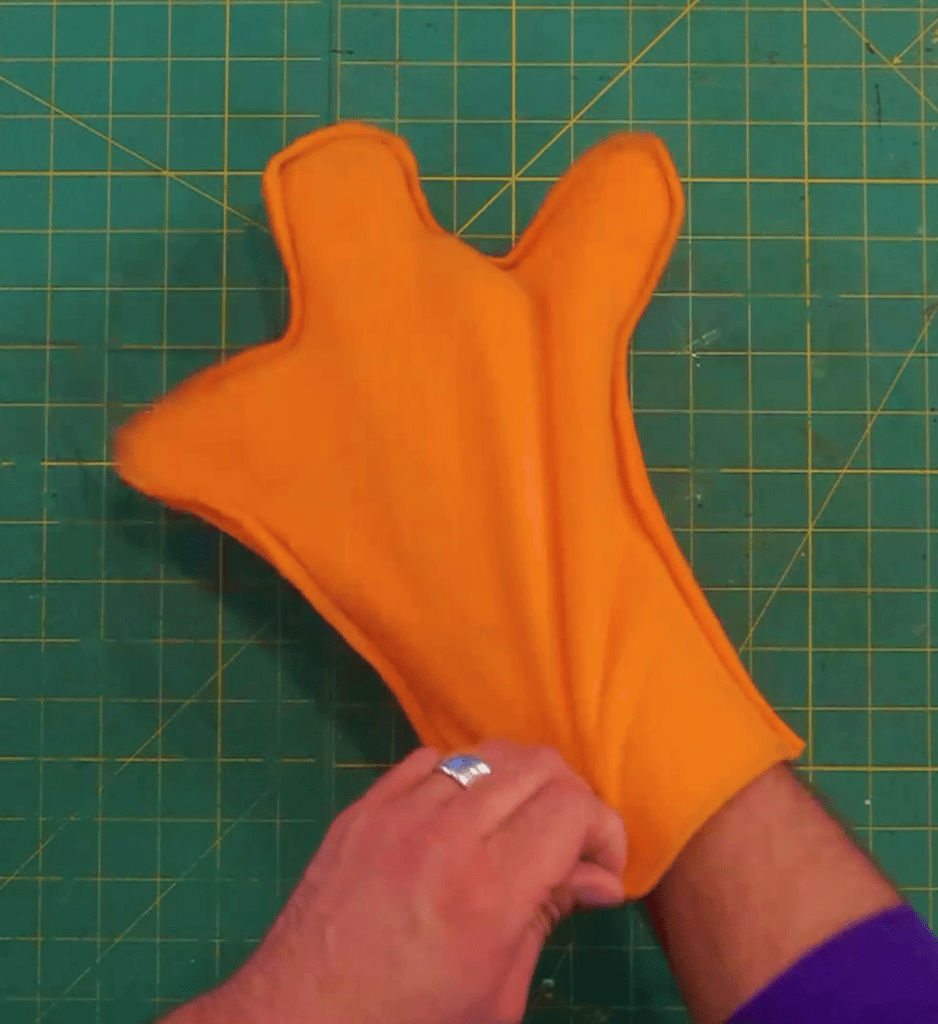
When it comes to cutting the puppet, there are two different methods depending on how you’re going to sew up your puppet. If you’re sewing by hand, cut directly on the lines. If you’re sewing on a sewing machine, it’s faster to sew the puppet up before cutting it out. Make sure not to sew up the bottom of the puppet.
STEP 3 – Turn it Inside Out
No matter how you’ve cut and sewed up your puppet, turn it inside out so the seams are hidden. You have the base of your puppet ready!
Decorate Your Puppet
The base of your glove puppet is ready, which means it’s time to decorate. You have free creative range for this section, but for some inspiration, this is how I chose to decorate my puppet.
Button Eyes- I used hot glue to stick the buttons onto my puppet to function as eyes.
Hair- Use any fluff or craft hair you can find. I chose a wacky purple color to pop against my puppet’s orange fleece. Again, I attached everything with hot glue.
Mouth- The mouth was simple. I drew a slightly crooked line with a sharpie to act as the mouth.
Upgrade the Puppet
The first glove puppet we’ve made was fairly simple. If you want to make a more complex glove puppet, follow these steps to take your puppet up a notch:
Make Your Base- Start by making the base of your puppet the exact same way, using the pattern or your hand.
Sculpt the Head- I am using foam to sculpt a round head for the top. Play around with it. Mine ended up being a round egg shape.
Attach the Head- Since I’m using soft form for the head, all I have to do is make a slit in it to attach to the top of the puppet. I used a razor blade for this step and cut it almost all the way in half. About ¾ of the way up is perfect. I then used hot glue to place it right on the glove puppet.
Cover the Head- Wrap the head in the same fleece you used for the body and adhere with hot glue. You may need to cut slits in some of the fleece to lay the fabric flat and tight to the foam.
Add Your Decoration- I was going for an alien theme so I added sparkly green pipe cleaners to the top to function as antennas. I also button eyes and drew on all other features.
You’ve Made a Glove Puppet!
Your glove puppet is complete. Feel free to get creative when decorating your glove puppet and make it uniquely yours. I’ve made glove puppets when in a crunch for 24-hour film festivals. They’re a great way to make a high-quality puppet fast. Try it out and let me know how your glove puppet turns out!